Tuesday, February 24, 2015

Dissection of the Lung

2/23/15- 2/24/15

Focus of Procedure:
1) Locate the primary, secondary and tertiary bronchi of the lung.
2) Locate alveoli and observe under a microscope.

Materials: scalpel, tweezers, teaser needle, microscope, glass slide (for microscope), and plastic bag.

Procedure:
1) Remove the heart, lungs and trachea from the plastic bag.
2) Using a scalpel and tweezers (if necessary), detach the heart from the lungs.
3) Locate the primary bronchi and secondary bronchi of the lung. The primary bronchi branch off from the end of the trachea. The secondary bronchi branch off from the primary bronchi.
4) Select one lobe from the lungs to dissect. Using a teaser needle, make an incision down each side of the secondary bronchi. Do this in order to locate the tertiary bronchi, which branch off from the secondary bronchi.
5) Follow the tertiary bronchi with the teaser needle. You will be able to locate and observe the alveoli at the ends of the tertiary bronchi.
6) Once you have located the primary, secondary and tertiary bronchi, take a picture.
7) Now use the scalpel to remove a tiny piece of the end of the lobe you were just dissecting.
8) Take out the microscope and a glass slide. Place the piece of lung on the glass slide and place the glass slide under the microscope. Observe the alveoli under the microscope.
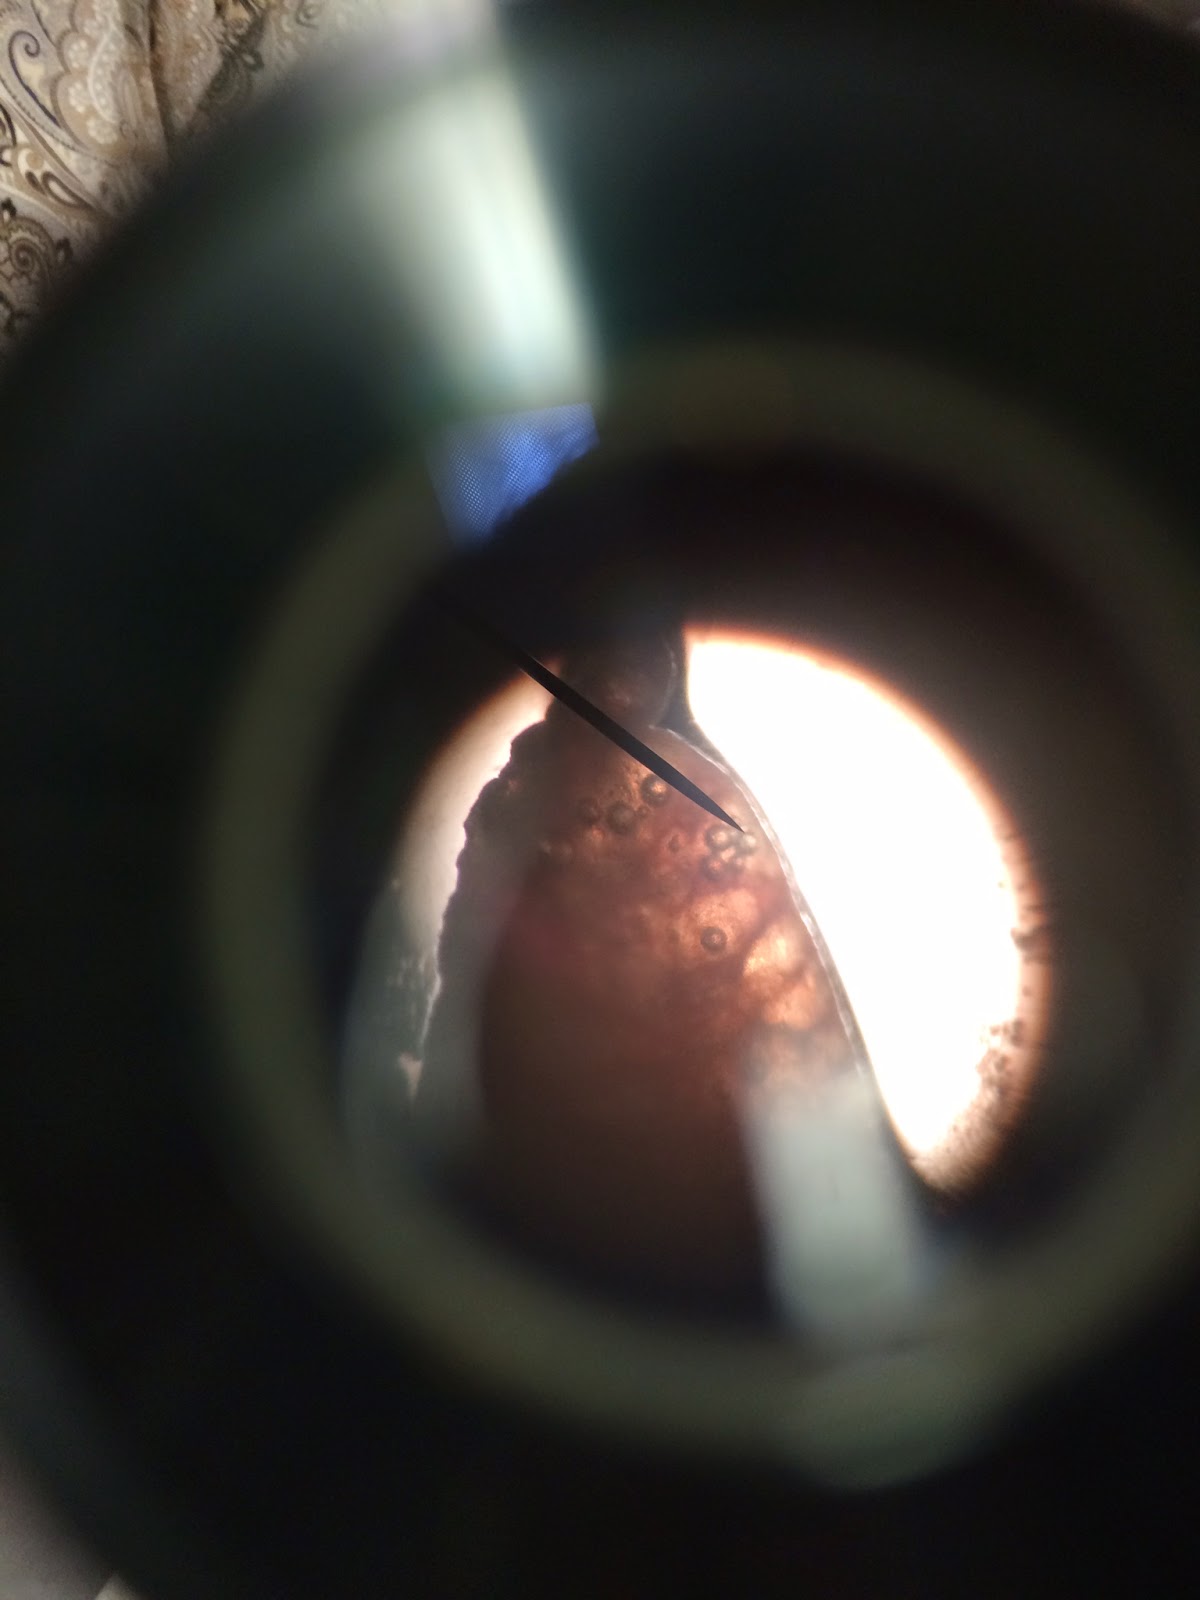
9) Take a picture of the microscopic view of the alveoli.
10) Place the heart, lungs and trachea back into the plastic bag.

Data and Observations: I found it quite easy to locate the primary, secondary and tertiary bronchi. It was very interesting to dissect a lung because I have always wondered what the inside of a lung looks like. I also enjoyed observing the alveoli under the microscope. At first I thought the air bubbles in the lung were the alveoli, but then my teacher corrected me; The white circles I saw were the alveoli and the black smaller circles were air bubbles. Looking at the lung under the microscope was very cool! All of Semara's (the cat's) organs seemed to be in very good shape, despite the fat around her heart. I definitely enjoyed this unit and cannot wait to continue dissecting! Pictures and data shown below.

*INCASE YOU CAN'T READ THE PICTURE, READ THE TEXT BELOW!

What did you learn from the Lung presentation that you did?

I learned the seriousness of cystic fibrosis. I learned that cystic fibrosis causes a defect in a gene that causes sticky, thick mucus to develop in tubes, ducts and passageways of the lungs, making it very difficult and painful to breathe. I also learned about the different chest physical therapy and machines that can help a person with cystic fibrosis breathe better, Most importantly I learned where to get treatment or a diagnosis if I or a loved one ever has symptoms of cystic fibrosis.


Removal of the Heart and Lungs

2/12/15

Focus of Procedure: Remove the heart, lungs and trachea from the cat's body.

Materials Needed: scalpel, tweezers, and plastic bag,

Procedure: Part One- Removing the Heart, lungs and trachea.
1) Using a scalpel, make a vertical incision going down the center of the chest, from the sternum to the end of the ribs. This incision may be slightly off center in order to remove the sternum easier.
2) Once this incision is made, remove the sternum, but do not cut into the diaphragm, which is directly inferior the lungs and ribs. Take pictures of the sternum once it is removed from the cat's body.
3) Now that the sternum is removed, make a vertical, off centered incision that goes up the neck of the cat. Make this incision deep enough to allow you to view the trachea. Be careful not to sever the trachea. Take a picture of the trachea, larynx, epiglottis and thyroid glands. The larynx is superior the trachea and the epiglottis is superior the larynx. The thyroid glands are located on either side of the trachea, inferior the larynx and epiglottis.
4) Using your scalpel (and tweezers if necessary), begin to disconnect the trachea, allowing you to remove it from the neck of the cat. Try to keep the larynx and epiglottis intact (located superior the trachea) for labeling purposes.
5) Begin to make a deeper vertical cut down the cat's ribs and attempt to pull the ribs apart, allowing you a clear view of the heart and lungs. Take pictures of the location of the heart, lungs and diaphragm inside the cat. Also take a picture of the thymus, which is located superior the heart to the right.
6) Once the ribs are moved away from the heart and lungs, carefully detach the back of the lungs from the wall of the chest. Be sure to leave the heart connected to the lungs and do not sever any part of the lungs, heart or trachea.
7) Continue to pull the ribs apart and use your scalpel and tweezers to cautiously remove the heart, lungs and trachea. If necessary, break the ribs in order to disconnect the lungs from the chest wall.
8) Once the lungs are disconnected from the chest wall, make an incision at the bottom of the lungs, detaching the lungs from the front of the diaphragm.
9) The lungs, heart and trachea should be completely detached from the cat's body and able to be entirely removed.
10) Take pictures of the epiglottis, larynx, trachea, thyroid glands ( if still intact), thymus (if still intact), heart and lungs outside of the cat's body.
11) Place the lungs, heart and trachea into a large plastic bag when done taking pictures.

Data and Observations: Removing the trachea, heart and lungs from the chest was harder than expected. I had no difficulty removing the trachea but, I had to crack most of the ribs in order to reach the sides of the lungs and remove them. At first I was not sure what I was doing and was afraid to make an incision on the cat because I did not want to make a mistake. Once I figured out how to remove the organs, everything was easy. I really enjoyed observing these organs, especially the trachea! Observing a trachea up close was a very cool experience and observing the lungs and heart was also very interesting! This has been my favorite unit so far and I am excited to further dissect the lungs and heart in the future. Pictures and data are shown below.